
Once done, you can just select the app on your home screen, and you will be taken directly to your Pronestor Workspace solution.
Once done, you can just select the app on your home screen, and you will be taken directly to your Pronestor Workspace solution.
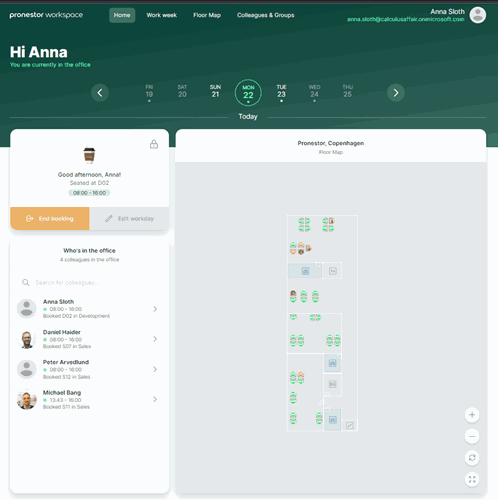
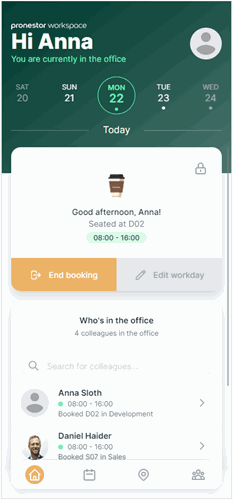
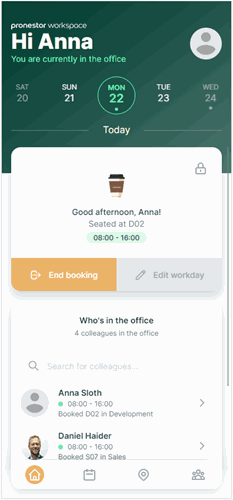
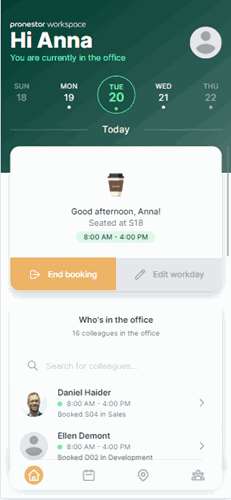
On the first page you’ll see the calendar scroll bar, which is an easy way to see if you have set your presence on the specific days or scroll through to set presence and/or make your bookings. On the days that you have set your presence, you’ll see a tiny dot below the date – if no dot, there’s no presence or booking.
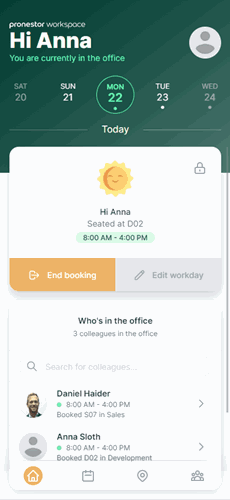
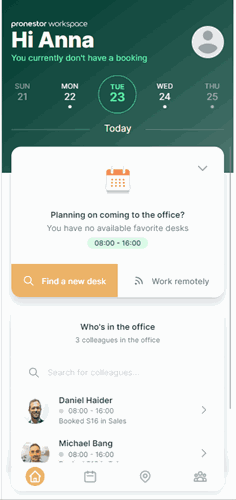
Below the calendar scroll bar, you’ll see your status for the day. To set your presence for the day, you can choose between “Book my desk” or “Work remotely” as quick-book options. If you want to set another presence, please do as follows:
E.g., if you choose working remotely because you’re visiting a client, you can add this as text, and it will be visible for your colleagues.

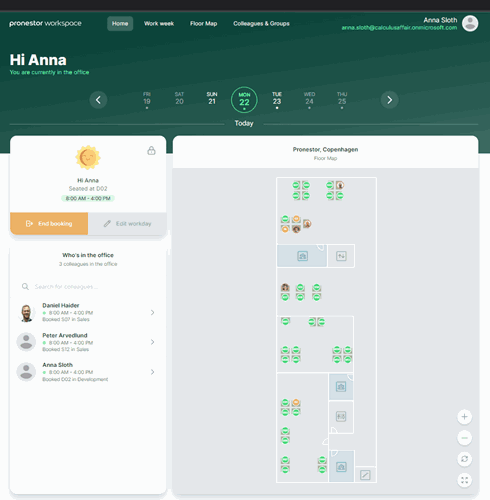
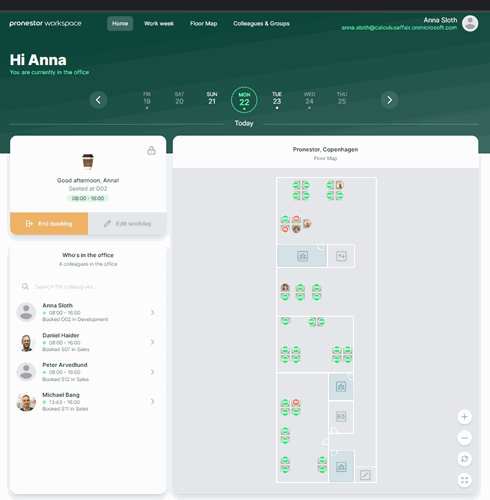
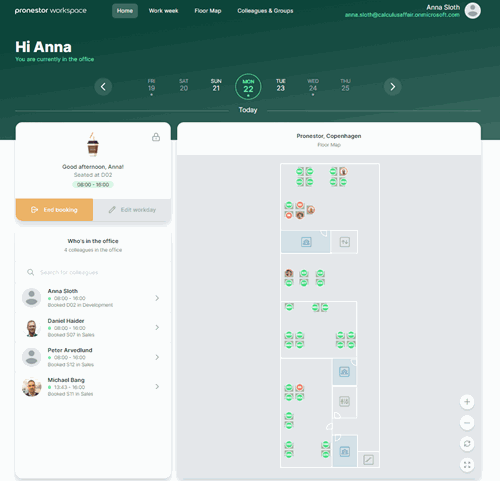
If you’re using the desk top version, you’ll also see a floor map. If you wish to see the floor map for a specific area, please go to My profile (click your name/avatar at the top), choose Settings and set your preferred area. The floor map on the home page will now show the floor map for your preferred area.
Start at the Home page of Workspace and use the calendar scroll bar to go to the date you want to book a desk. On the left side of the screen, you will either see the option “Book desk”, if you have set a favorite desk, or “Find a new desk” if you haven’t set a favorite. If you select “Find a new desk”, you must now choose whether you wish to
Sit close to a colleague – Start by finding and selecting the colleague you wish to sit nearby. This will show you either a floor map or list view of the desks in the area. At the icon on the right side of “Filters”, you can switch between floor map and list view, if you use floor maps. On the lower right-hand side, you can zoom, rotate, or expand the floor map. Find and select an available desk and book it.
Sit in a specific area – This will show you the desks either in list view or as a floor map. At the icon on the right side of “Filters”, you can switch between floor map and list view, if you use floor maps. On the lower right-hand side, you can zoom, rotate, or expand the floor map. Find and select an available desk and book it.
Choose from favorite desks – By choosing this, you will see your list of favorite desks, and you can select the one you with to book. If you are unsure how to add favorite desks to your profile, please check the section regarding “My profile” [Indsæt link til den del af guiden]
If you see the option to “Book desk”, your mostly used favorite desk will automatically be booked for you.
Start at the Home page of Workspace and use the calendar scroll bar to go to the date you want to book a desk. You now have the option to either “Book desk”, if you have set a favorite desk, or “Find a new desk” if you haven’t set a favorite. If you select “Find a new desk”, you must now choose whether you wish to
Sit close to a colleague – Start by finding and selecting the colleague you wish to sit nearby. This will show you either a floor map or list view of the desks in the area. At the bottom of the screen, you can switch between floor map and list view, if you use floor maps. On the lower right-hand side, you can zoom, rotate, or expand the floor map. Find and select an available desk and book it.
Sit in a specific area – This will show you the desks either in list view or as a floor map. At the bottom of the screen, you can switch between floor map and list view, if you use floor maps. On the lower right-hand side, you can zoom, rotate, or expand the floor map. Find and select an available desk and book it.

Choose from favorite desks – By choosing this, you will see your list of favorite desks, and you can select the one you with to book. If you are unsure how to add favorite desks to your profile, please check the section regarding “My profile”.

At the Home screen, below your presence for the day, you can see which colleagues are in the office. You can either scroll down the list to find a colleague, or simply use the search bar at the top to find your colleague. Once found, you can select the chevron on the right, to see where your colleague is seated. If you wish to see his/her bookings for this week or the coming weeks, select the chevron on the right side of your colleague’s name.

At the bottom of the screen, you’ll see the following icons:
In this section, you’ll get an overview of your presences for this week. You can also see your past and future bookings or presences. Please note that historic data is locked and can’t be edited.

This section will show you the floor map of your preferred area, or for the entire organization. Use this to see where your colleagues are seated or where you can find an available desk. If you want to book an available desk, simply select it, and complete the booking. On the lower right-hand side, you can zoom, rotate, or expand the floor map.
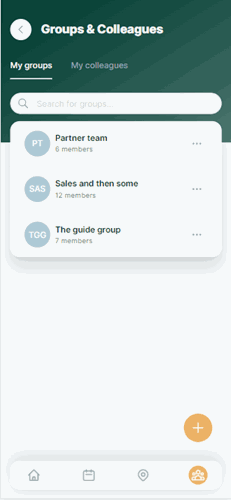
In this section, you’ll find 2 different options – Groups and Colleagues.
In Groups, you can see all the groups you’re already part of or create your own group.
By creating a group, you can see the current presences of all members, as well as their future presences. Please be aware that only Pronestor Workspace users can be added to groups.
Your group has now been created and will be visible in your list of groups. It will also be visible for other users if they are searching for groups.
To see the presence of the group members:
To book desks for your group:
The desks are now booked for your group and the members will receive an in-app notification that you have made a booking and which desks are booked for them. The members of your group can then either accept or decline the booking.
If you wish to join an existing group:
If you wish to leave a group:
In Colleagues, you will see a list of all your colleagues and their presence. At the top, you can search for a colleague and select the chevron to see the presence – if your colleague has booked a desk, you’ll also be able to see which desk. When looking at your colleague’s profile, you can select the calendar and see past and future bookings or presences.
At the top of the screen, next to your name, you’ll see an avatar. Select this to go your profile, where you have the following 3 options:
At Details, you can see your current presence. If you have access to the Administration site and go to Workspace from your desktop (not mobile) you will have the option to click “Go to admin site”. From desktop and mobile, you also have the option to select sign out.
At My favorite desks, you can see the list of your favorite desks. Use the filter on the top left side to search for desks with specific attributes. Next to the filter, you have the option of changing the view between a list or grid view. You can see the desk name, the availability of the desk and the attributes. If you want to find a specific desk, use the Search option, also found above the list of favorite desks.
At Settings, you can set your preferred area. When you select a preferred area, the floor map will update and show you your preferred area. You can change your language as well – either select a specific language or set it to use the language from your browser.